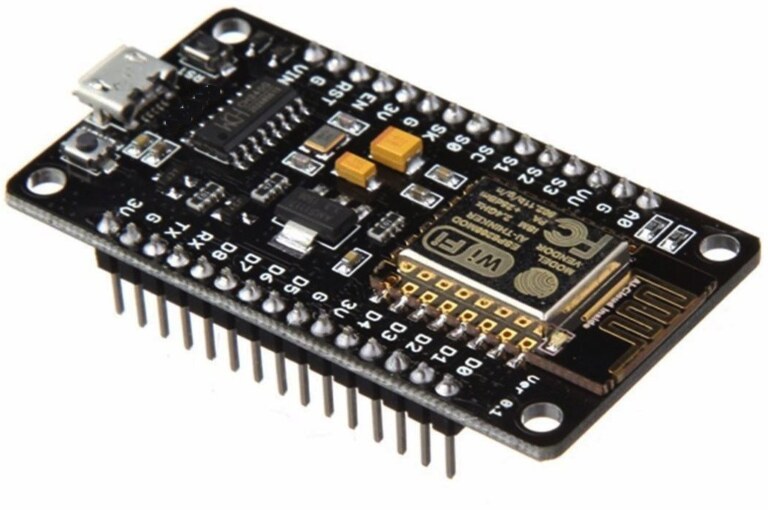
The NodeMCU (ESP8266) is one of the most popular Wi-Fi-enabled microcontroller development boards in the world of DIY electronics, IoT projects, and home automation. It’s cost-effective, powerful, and supports programming via Arduino IDE, making it beginner-friendly. In this guide, we’ll cover everything you need to know about NodeMCU, including its pinout, working, programming, and comparisons with ESP32 and Arduino.
What is NodeMCU (ESP8266)?
NodeMCU is an open-source IoT platform based on the ESP8266 Wi-Fi SoC developed by Espressif Systems. The name “NodeMCU” typically refers to a development board that includes the ESP8266 chip, USB interface, and breakout pins — ready for prototyping.
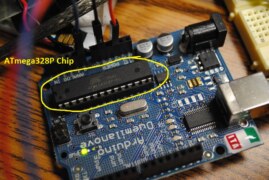
Unlike traditional microcontrollers like Arduino UNO, NodeMCU comes with built-in Wi-Fi, making it ideal for IoT-based applications.
NodeMCU (ESP8266) Features
| Feature | Description |
|---|---|
| Microcontroller | ESP8266 (ESP-12E Module) |
| Clock Speed | 80 MHz / 160 MHz |
| Flash Memory | 4 MB |
| RAM | 50 KB available |
| Wi-Fi | 802.11 b/g/n |
| GPIO Pins | 11 (PWM, ADC, UART, I2C, SPI support) |
| Operating Voltage | 3.3V |
| Programming | Arduino IDE / Lua / MicroPython |
| USB Interface | Micro USB (for power & code upload) |
| Price | Very low (~$3–$6 USD) |
NodeMCU Pinout Diagram
The NodeMCU board includes multiple General Purpose Input/Output (GPIO) pins. Some of these pins are shared with SPI, I2C, and UART peripherals.
Commonly Used Pins:
| Pin | Function |
|---|---|
| D0 | GPIO16 – Wakeup (no PWM) |
| D1 | GPIO5 – I2C (SCL) |
| D2 | GPIO4 – I2C (SDA) |
| D3 | GPIO0 – Must be HIGH at boot |
| D4 | GPIO2 – Onboard LED (Active LOW) |
| D5 | GPIO14 – SPI CLK |
| D6 | GPIO12 – SPI MISO |
| D7 | GPIO13 – SPI MOSI |
| D8 | GPIO15 – Must be LOW at boot |
| A0 | ADC (0V to 1V) |
| RX | GPIO3 – Serial receive |
| TX | GPIO1 – Serial transmit |
⚠️ Boot-sensitive pins (D3, D4, D8) should be used carefully.
How NodeMCU (ESP8266) Works
At its core is the ESP8266 chip, which handles both Wi-Fi connectivity and microcontroller functions. When you upload a program using the Arduino IDE or Lua interpreter, it is stored in the onboard Flash memory.
Once powered on, the board:
- Boots up from flash.
- Connects to Wi-Fi (if coded).
- Executes the user program (e.g., reads sensors, sends data to cloud).
NodeMCU uses firmware written in C++ or Lua. Thanks to its USB interface, it can be directly programmed using Arduino IDE over Micro USB.
How to Program NodeMCU in Arduino IDE
Required Setup:
- Install Arduino IDE
- Add ESP8266 Board Support in Board Manager:
- File > Preferences > Additional Board URLs: bashCopyEdit
http://arduino.esp8266.com/stable/package_esp8266com_index.json - Then go to Tools > Board Manager > Install “esp8266 by ESP8266 Community”
- File > Preferences > Additional Board URLs: bashCopyEdit
- Select Board:
- Tools > Board > NodeMCU 1.0 (ESP-12E Module)
- Connect via USB and upload your code!
Blink Example Code (Onboard LED):
cppCopyEditvoid setup() {
  pinMode(LED_BUILTIN, OUTPUT); // D4 (GPIO2)
}

void loop() {
  digitalWrite(LED_BUILTIN, LOW);  // Turn LED ON
  delay(1000);
  digitalWrite(LED_BUILTIN, HIGH); // Turn LED OFF
  delay(1000);
}
This will blink the onboard LED connected to D4 (GPIO2).
Use Cases of NodeMCU (ESP8266)
- Wi-Fi Controlled LEDs, Motors, or Relays
- Smart Home Automation
- IoT Weather Station (with DHT11/DHT22)
- Data Logging to Thingspeak, Blynk, or Firebase
- Notification Alerts via Webhooks
- Real-Time Sensor Dashboards
- Smart Plant Watering Systems
NodeMCU vs Other Boards (ESP32, Arduino UNO, Raspberry Pi Pico)
| Feature | NodeMCU (ESP8266) | ESP32 | Arduino Uno | Raspberry Pi Pico |
|---|---|---|---|---|
| Wi-Fi | ✅ Yes | ✅ Yes + BT | ❌ No | ❌ No |
| Bluetooth | ❌ No | ✅ Yes | ❌ No | ❌ No |
| GPIO Pins | ~11 | ~30+ | 14 | 26 |
| ADC | 1 (10-bit) | 18 (12-bit) | 6 (10-bit) | 3 (12-bit) |
| Clock Speed | 80–160 MHz | 160–240 MHz | 16 MHz | 133 MHz |
| Programming | Arduino/Lua/Python | Arduino/ESP-IDF | Arduino only | MicroPython/C |
| USB Support | Micro USB | Micro USB/USB-C | USB-B | Micro USB |
| Price | ~$3 | ~$5–10 | ~$6–8 | ~$4–6 |
Verdict:
- Choose NodeMCU for simple IoT and Wi-Fi projects.
- Use ESP32 if you need more GPIOs or Bluetooth.
- Use Arduino UNO if Wi-Fi isn’t required and for absolute beginners.
- Use RPi Pico for advanced MicroPython-based multi-core tasks.
NodeMCU-Compatible Sensors & Modules
| Sensor/Module | Purpose |
|---|---|
| DHT11/DHT22 | Temperature & Humidity |
| HC-SR04 | Ultrasonic Distance |
| IR Sensor | Motion Detection |
| Relay Module | Device Switching |
| OLED Display (I2C) | Visual Output |
| DS18B20 | Waterproof Temperature |
| MQ Gas Sensors | Air Quality |
| DS3231 RTC | Real Time Clock |
Frequently Asked Questions (FAQs)
❓ Can NodeMCU run on 5V power?
No, the ESP8266 runs on 3.3V, but the NodeMCU board accepts 5V via Micro USB and regulates it down internally.
❓ Can I connect NodeMCU to cloud services?
Yes! It works great with:
- Thingspeak
- Blynk
- Firebase
- IFTTT
- MQTT servers
❓ Does NodeMCU have Bluetooth?
No, the ESP8266 chip does not support Bluetooth. Use ESP32 for Wi-Fi + Bluetooth.
❓ Can I run MicroPython on NodeMCU?
Yes, you can flash MicroPython firmware and control the board with Python code.
❓ What IDEs can be used to program NodeMCU?
- Arduino IDE
- VS Code + PlatformIO
- Lua uploader tools
- Thonny (for MicroPython)
Troubleshooting Tips
| Problem | Fix |
|---|---|
| COM Port not detected | Install CH340 USB driver |
| Code not uploading | Hold FLASH button during boot |
| Wi-Fi not connecting | Check SSID/password in code |
| Random reboots | Power supply may be unstable |
| GPIO not responding | Avoid boot-sensitive pins (D3, D8) |
Summary
The NodeMCU (ESP8266) board is a reliable and affordable way to bring Wi-Fi capabilities into your DIY electronics. With built-in networking, Arduino compatibility, and extensive community support, it’s a perfect choice for beginners and pros alike.
Whether you’re building a smart home system or logging weather data to the cloud, NodeMCU gets the job done — with fewer wires, less code, and minimal cost.
Related Posts You May Like
- Smart Home Automation Using NodeMCU
- DHT11 Sensor with NodeMCU & OLED
- Wi-Fi Relay Control via Web Page
- ESP32 vs NodeMCU – Which to Choose?
photo by wikimedia