An OLED Display (I2C) is one of the most elegant, power-efficient, and versatile display modules for DIY electronics. Whether you’re building an Arduino-based project, a weather station, or a wearable device, this tiny screen can provide sharp visual feedback. In this complete guide, you’ll learn what an I2C OLED display is, how to wire it, display text and graphics, and compare it with other display technologies.
What is an OLED Display (I2C)?
OLED (Organic Light-Emitting Diode) displays emit light directly from pixels, unlike traditional LCDs that need a backlight. The I2C OLED display uses the I2C communication protocol, requiring only two data lines (SDA and SCL) to operate, making it ideal for microcontrollers with limited I/O pins.
Most common modules feature a 0.96-inch screen with a resolution of 128×64 pixels and use the SSD1306 driver IC.
Features of I2C OLED Display
| Feature | Specification |
|---|---|
| Resolution | 128×64 pixels |
| Interface | I2C (2 wires: SDA & SCL) |
| Driver IC | SSD1306 |
| Voltage | 3.3V–5V compatible |
| Power Consumption | Low (<20mA) |
| Color | Usually Monochrome (White/Blue/Yellow) |
| Viewing Angle | >160° |
| Size | Commonly 0.96”, 1.3”, 1.5” |
Pin Configuration of I2C OLED Display
| Pin | Description |
|---|---|
| GND | Ground |
| VCC | Power (3.3V or 5V) |
| SCL | I2C Clock Line |
| SDA | I2C Data Line |
How OLED I2C Display Works
Unlike LED or LCD displays that require refreshing or backlight, OLEDs produce light pixel by pixel using organic compounds. Each pixel can turn on/off independently, enabling sharp contrast and deep blacks.
The I2C communication allows microcontrollers to control the display using just two pins. The SSD1306 driver handles the low-level pixel control, while high-level libraries like Adafruit_SSD1306 allow easy drawing of text, lines, and bitmaps.
Wiring OLED Display (I2C) with Arduino
Required Components:
- I2C OLED Display (SSD1306, 128×64)
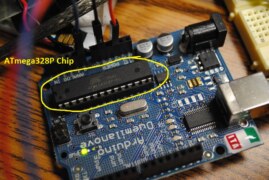
- Arduino UNO/Nano/ESP32
- Jumper wires
- Breadboard
Circuit Connections:
| Arduino UNO | OLED Display |
|---|---|
| GND | GND |
| 5V | VCC |
| A4 | SDA |
| A5 | SCL |
⚠️ For ESP32 or ESP8266 boards, I2C pins are different:
- ESP32:
SDA = GPIO 21,SCL = GPIO 22 - ESP8266 (NodeMCU):
SDA = D2,SCL = D1
Sample Code for OLED Display (I2C)
Install these libraries via Arduino Library Manager:
Adafruit SSD1306Adafruit GFX
cppCopyEdit#include <Wire.h>
#include <Adafruit_GFX.h>
#include <Adafruit_SSD1306.h>

#define SCREEN_WIDTH 128
#define SCREEN_HEIGHT 64
#define OLED_RESET -1
Adafruit_SSD1306 display(SCREEN_WIDTH, SCREEN_HEIGHT, &Wire, OLED_RESET);

void setup() {
  Serial.begin(9600);
  if (!display.begin(SSD1306_SWITCHCAPVCC, 0x3C)) {
    Serial.println(F("OLED not found"));
    while (true);
  }

  display.clearDisplay();
  display.setTextSize(1);
  display.setTextColor(SSD1306_WHITE);
  display.setCursor(0, 10);
  display.println("Hello from ToolopediaX!");
  display.display();
}

void loop() {
  // Your dynamic content here
}
Applications of I2C OLED Displays
- 📈 Sensor Monitoring (temperature, humidity, gas)
- 🕹️ Game Displays
- ⌚ Wearables and Smart Watches
- 📟 Mini Dashboards
- 🚀 IoT Devices and Clocks
- 🎛️ Oscilloscopes or Signal Visualizers
Comparison: I2C OLED vs Other Display Modules
| Feature | OLED (I2C) | LCD 16×2 | OLED (SPI) | TFT LCD |
|---|---|---|---|---|
| Interface | I2C (2 wires) | I2C/Parallel | SPI (4 wires) | SPI/Parallel |
| Power Use | Low | Medium | Medium | High |
| Size | Compact | Medium | Compact | Large |
| Resolution | 128×64 | 16 chars × 2 lines | 128×64 | 160×128 / 320×240 |
| Color | Mono | Mono | Mono | Full Color |
| Contrast | Very High | Low-Medium | High | High |
| Refresh Rate | Fast | Slow | Fast | Very Fast |
| Ease of Use | Very Easy | Easy | Moderate | Moderate-Advanced |
| Cost | Low | Very Low | Slightly Higher | High |
Verdict:
- Use I2C OLED for compact, high-contrast displays in sensor/portable projects.
- Use LCD 16×2 if you just want text and ultra-simple interface.
- Use SPI OLED for faster data rates and animation.
- Use TFT LCD for color GUIs, video, and rich graphics.
Choosing the Right OLED Module
| Parameter | Considerations |
|---|---|
| Interface | I2C is better for simpler wiring |
| Voltage Compatibility | Ensure it supports 3.3V or 5V (check datasheet) |
| Driver IC | SSD1306 is most common and widely supported |
| Resolution | 128×64 is standard; 128×32 is narrower |
| Size | Choose from 0.96”, 1.3”, or larger based on your need |
Frequently Asked Questions (FAQs)
❓ Can I use multiple I2C OLEDs on one Arduino?
Yes, if each display has a unique I2C address. Use I2C scanners to find and set addresses.
❓ What is the I2C address of SSD1306 OLED?
Typically 0x3C or 0x3D. Use an I2C scanner sketch to detect yours.
❓ Is the OLED display sunlight readable?
Not directly. OLEDs have high contrast, but their brightness is lower than TFTs. They are great indoors or under shade.
❓ How to prevent OLED burn-in?
Avoid displaying static content for long periods. Use screen savers or rotate the data.
❓ Can I display images and custom graphics?
Yes, you can use tools like LCD Assistant or online bitmap-to-hex converters to display logos and images.
Troubleshooting Tips
| Issue | Solution |
|---|---|
| OLED not turning on | Check VCC, GND, and address |
| Display shows garbage | Use correct library & address |
| Flickering text | Avoid redundant redraws or use partial updates |
| I2C scanner not detecting | Try alternate pull-up resistors or I2C pins |
Conclusion
The OLED Display (I2C) is a powerful, space-saving, and energy-efficient tool for any electronics enthusiast or prototyper. Its minimal wiring, crisp visuals, and flexible libraries make it ideal for real-world projects — from clocks and smart gadgets to IoT dashboards and game consoles.
Compared to traditional LCDs and SPI OLEDs, it wins in simplicity, style, and clarity — making it the go-to display for modern microcontroller projects.
Key Takeaways:
- Use I2C OLED for simple, two-wire interfacing.
- Libraries like Adafruit SSD1306 make development quick.
- Choose the correct I2C address and voltage level.
- OLEDs are better than LCDs in contrast and aesthetics.
Related Projects You May Like:
- Weather Monitor using OLED & DHT11
- I2C OLED Digital Clock with DS3231
- Mini Game Console using OLED and Buttons
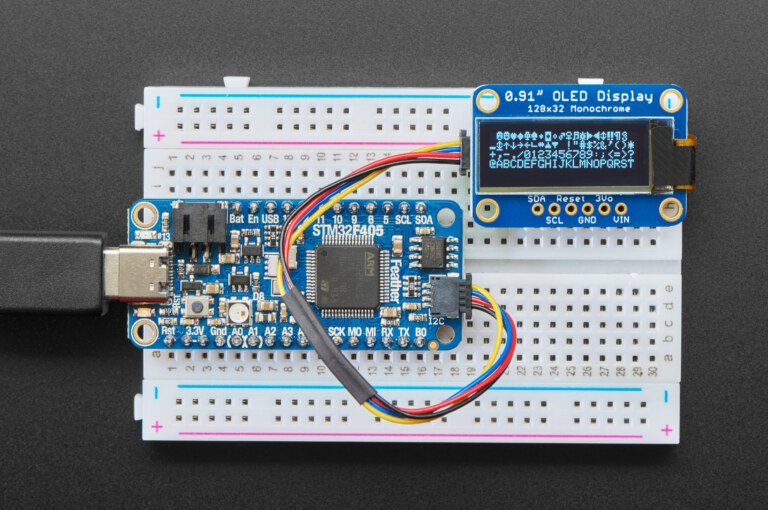
photo by Adafruit Industries