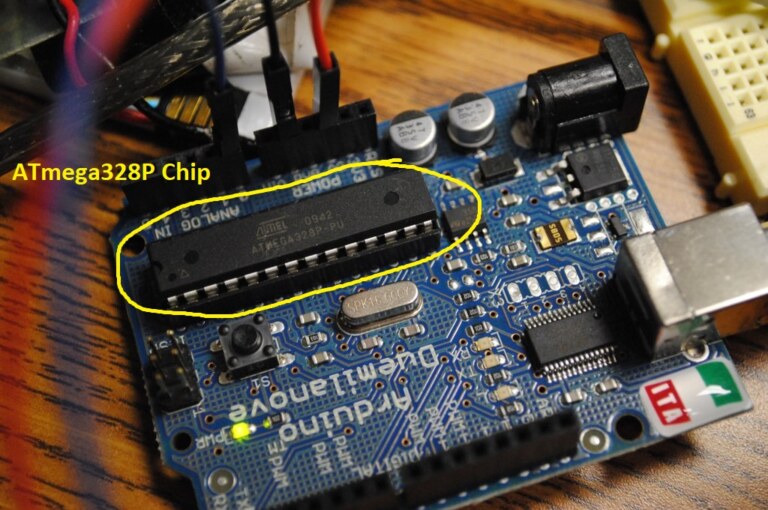
If you’ve ever worked on Arduino-based electronics projects, chances are you’ve already used the ATmega328P microcontroller, even if you didn’t know its name. It’s the tiny but powerful chip that runs inside the famous Arduino Uno board. But beyond the Uno, the ATmega328P has a personality of its own — compact, reliable, and full of potential for any embedded project.
You can find relevant project : DIY Line Following Robot using Arduino
In this post, we’ll explore everything about the ATmega328P: from its features and circuit connections to pros, cons, comparisons with other chips, and even a personal story that highlights why it’s a favorite among hobbyists and professionals alike.
About ATmega328P
The ATmega328P is an 8-bit AVR microcontroller developed by Microchip Technology (previously Atmel). The “P” stands for “PicoPower,” meaning it’s designed for low-power applications.
Despite its small form factor, it includes everything you need for a functioning microcontroller system — CPU, RAM, Flash memory, EEPROM, timers, ADCs, and communication protocols.
It’s the go-to chip in:
- Arduino Uno
- Arduino Nano
- DIY embedded systems
- Home automation projects
- Robotics
- IoT prototypes
Key Features of ATmega328P
Let’s look at why this tiny 28-pin chip is so popular:
| Feature | Description |
|---|---|
| Architecture | 8-bit AVR RISC |
| Operating Voltage | 1.8V – 5.5V |
| Clock Speed | Up to 20 MHz |
| Flash Memory | 32 KB |
| SRAM | 2 KB |
| EEPROM | 1 KB |
| GPIO Pins | 23 programmable I/O |
| ADC | 10-bit, 6 channels |
| Timers | 3 (two 8-bit, one 16-bit) |
| UART, SPI, I2C | Supported |
| PWM Channels | 6 |
Its balance of performance and low power consumption makes it perfect for both battery-powered and AC-powered applications.
Basic Circuit Diagram (Standalone)
While the Arduino Uno uses this chip on a big board, you can use the ATmega328P standalone in your own custom PCB. Here’s a simple minimum connection circuit:
Required Components:
- ATmega328P (DIP)
- 16 MHz Crystal Oscillator
- 2 x 22pF Capacitors
- 10kΩ Resistor (for RESET pull-up)
- Bypass Capacitors (100nF)
- Power Supply (5V regulated)
Circuit Overview:
pgsqlCopyEdit           +5V
            |
          [10KΩ]
            |
RESET ---/\/\/\/\---+-------- GND
                   |
                 RESET
                   |
             +------------+
             | ATmega328P |
             |            |
  XTAL1 ----| 9        28 |---- +5V
  XTAL2 ----| 10       7  |---- GND
             |            |
             +------------+

XTAL1 & XTAL2 connected to 16MHz crystal with 22pF caps to GND.
Once uploaded with a bootloader (or programmed via ISP), this setup can run independently from an Arduino board.
Pros and Cons
Let’s break down the strengths and weaknesses of using the ATmega328P:
Pros:
- Widely Supported: Tons of Arduino libraries and tutorials.
- Low Power Modes: Ideal for battery projects.
- Inexpensive: Budget-friendly microcontroller.
- Easy to Program: With Arduino IDE or AVR-GCC.
- Stable Performance: Used in thousands of commercial and DIY applications.
Cons:
- Limited Memory: Only 2KB SRAM restricts complex applications.
- 8-bit Architecture: Not as powerful as ARM-based chips.
- No USB Support: Requires external USB to Serial converter.
- Slower Clock Speed: Compared to 32-bit MCUs like ESP32.
ATmega328P vs Other Microcontrollers
| Feature | ATmega328P | ESP8266 | STM32F103 |
|---|---|---|---|
| Architecture | 8-bit AVR | 32-bit Xtensa | 32-bit ARM Cortex-M3 |
| Clock Speed | 16-20 MHz | 80–160 MHz | 72 MHz |
| Flash Memory | 32 KB | 4 MB | 64 KB |
| SRAM | 2 KB | 160 KB | 20 KB |
| Wi-Fi | ❌ | ✅ | ❌ |
| USB Support | ❌ (external) | ✅ | ✅ |
| Ease of Use | ✅ | ⚠️ | ⚠️ |
Verdict: ATmega328P is great for beginners and low-power projects, but for wireless or high-performance tasks, ESP32 or STM32 might be better suited.
❓ Frequently Asked Questions (FAQs)
1. Can I use ATmega328P without Arduino?
Yes. It can be used as a standalone microcontroller with minimal components. You’ll need a bootloader and a way to program it (like an FTDI USB-to-Serial or AVR programmer).
2. How do I burn the bootloader?
You can use another Arduino Uno as an ISP programmer via “Arduino as ISP” method in the Arduino IDE.
3. Is ATmega328P suitable for industrial applications?
For simple control tasks, yes. However, for more demanding or safety-critical systems, industrial-grade MCUs may be more appropriate.
4. What’s the difference between ATmega328 and ATmega328P?
The ‘P’ variant (PicoPower) supports additional low-power features. Most Arduino boards use the 328P.
5. How long can the ATmega328P run on a battery?
With proper low-power modes and a good power supply design, it can run for months or even years on a coin cell or AA batteries.
Personal Experience: Why I Love the ATmega328P
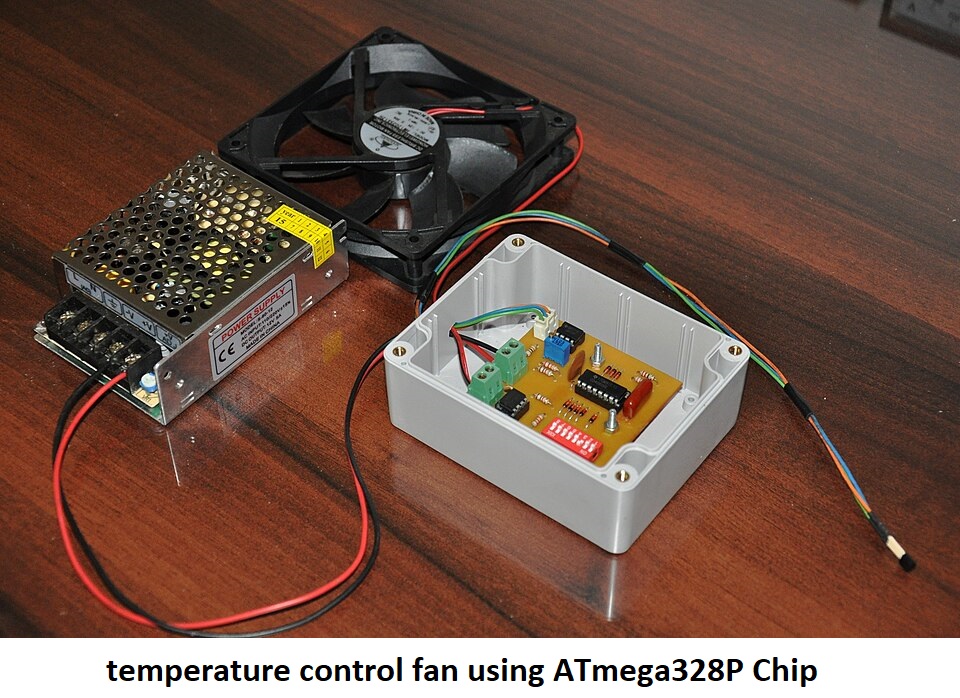
The first time I used the ATmega328P was inside an Arduino Uno while building a temperature-controlled fan for my old PC. At the time, I didn’t know what a microcontroller was. But after a bit of tinkering, I was able to write a simple sketch that used a temperature sensor to control fan speed using PWM.
Eventually, I learned to upload code directly to a standalone ATmega328P on a breadboard, saving cost and space. It felt empowering — like I’d built a mini computer on my own terms.
Since then, I’ve used this chip in line-following robots, home automation systems, and a soil moisture monitoring setup for my balcony plants. It never fails me. It’s not flashy, but it’s reliable, simple, and educational — the kind of chip that turns beginners into engineers.
Conclusion
The ATmega328P might seem outdated in an era dominated by ESP32s and Raspberry Pis, but its simplicity, reliability, and community support make it a classic — and still relevant — choice for embedded systems.
Whether you’re a beginner learning microcontrollers or a hobbyist looking to build efficient, low-power devices, this chip is a solid investment.
So the next time you blink an LED with an Arduino Uno, take a moment to appreciate the real star behind the scenes — the ATmega328P.
If you liked this article or have a question about ATmega328P, feel free to leave a comment. You can also check out our guide on Arduino Uno to dive deeper into real-world applications.
Photo by wikimedia